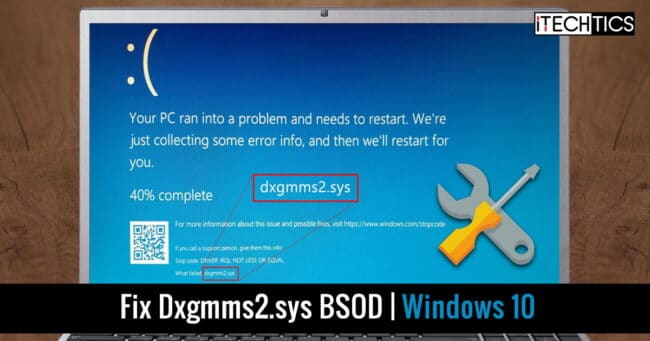
This is usually experienced while gaming or performing tasks that require heavy graphics rendering.
Therefore the entire computer will need to be restarted to repair the problem.
Also, remove your GPU and clean it as well as its bay.

For the hard drive, we recommend that you use anythird-party tools to check and monitor its health.
We suggest that you confirm that you have the latest driver for your GPU installed.
you’re able to download the latest drivers for your GPUs on the manufacturers website.
For AMD drivers, refer to theirwebsite.
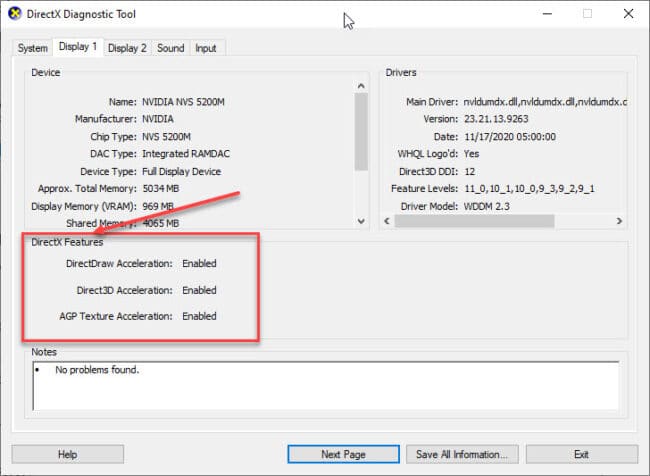
To trigger the tool, bang out indxdiagin Run.
Once the tool launches, switch to the Display tab and test whether the 3 features underDirectX Featuresare enabled.

If not, then there might be a compatibility problem with the driver and the GPU.
you’ve got the option to download all versions of DirectX fromthis post.
Reset complete BIOS configs
A misconfiguredBIOScan also lead to BSODs on your PC.
The process to reset BIOS prefs is almost the same on any computer, regardless of the manufacturer.
drop your system BIOS using the respective method given inthis post.
Then, scroll through different pages and look for Reset BIOS or Restore to default tweaks.

Usually, this can be found on theSave & Exitpage or on theSecuritypage.
PressEnterand then selectYesto reset the prefs.
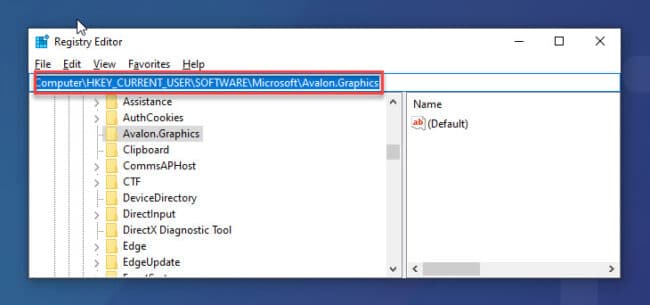
Now right-clickGraphicsDriversin the left pane, expandNew, and then clickDWORD (32-bit) Value.
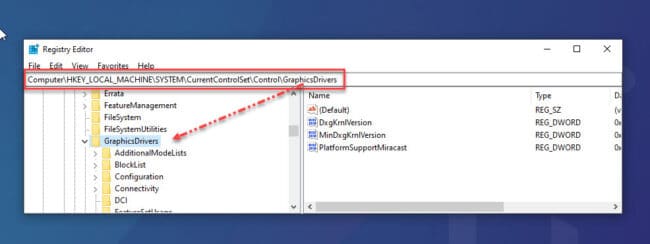
When created, name this new DWORD asTdrDelay.
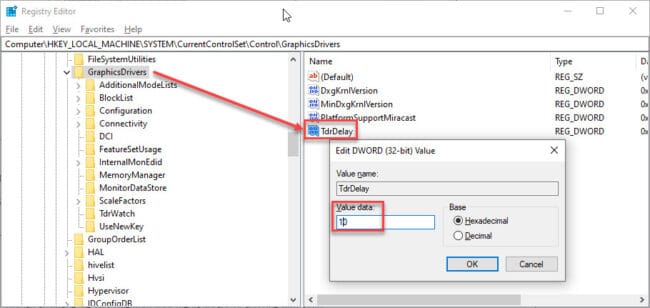
Double-clickTdrDelayand set its Value Data to10.
This will ensure that the GPU preempts the Scheduler after 10 seconds, rather than 2.

Of course, a system restart will be required before the changes take effect.
When the display attempts to return to wake mode, the computer encounters a Dxgmms2.sys exception.
Therefore, you oughta disable your computers sleep mode.
Here are4 ways to prevent your system from going to sleep.
However, it is of no use if it becomes the reason for BSODs.
Hardware acceleration may occasionally throw the Dxgmms2.sys exception.
Therefore, you gotta disable it and find out if the problem is resolved.
Now create a new DWORD (as in the previous section) and name itDisableHWAcceleration.
When created, set its Value Data to1.
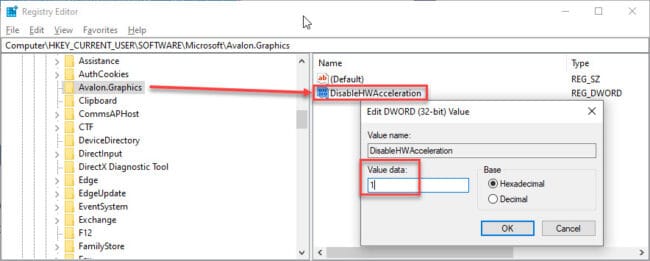
As per routine, your system will require a reboot so that the changes take effect.
0
Get weekly insights, tips and exclusive content delivered straight to your inbox.
Talk to us straight and get your questions answered right away


source: www.itechtics.com
